Utility Creation Tools
In this tutorial, we explain how to use the Utility Editor module of our creation tools. This editor contains a few similar elements to Entity Creation Tools and some concepts may be found in both tutorials.
You can use Utility Editor in two ways:
-
To configure the Utility AI in your game. You can essentially create the whole system, but certain logic must be provided in code:
-
the code behind
Considerations -
the code behind
Behaviors
-
-
To quickly prototype a particular Utility AI without the actual game.
-
you can setup the system and play with it in the editor. This can help you iteratively design the ultimate configuration that works for the game.
-
Utility Editor uses Considerations and Behaviors as references to things that exist in the game. The editor does not use or require their code (logic). Those elements can be referenced by the name identifier in the editor. However, in the actual game you need to provide the code. This is highly specific logic so it cannot come with predefined implementation. This tutorial will go back to this issue in Section Using the Configuration in your Game.
|
Getting started
To create a new configuration file, click the Create new project button or open an existing project by clicking the Open project button.
In this manual page, we will show you how to configure the system from scratch. You can save your project at anytime and open it to continue working from where you saved.
Overview
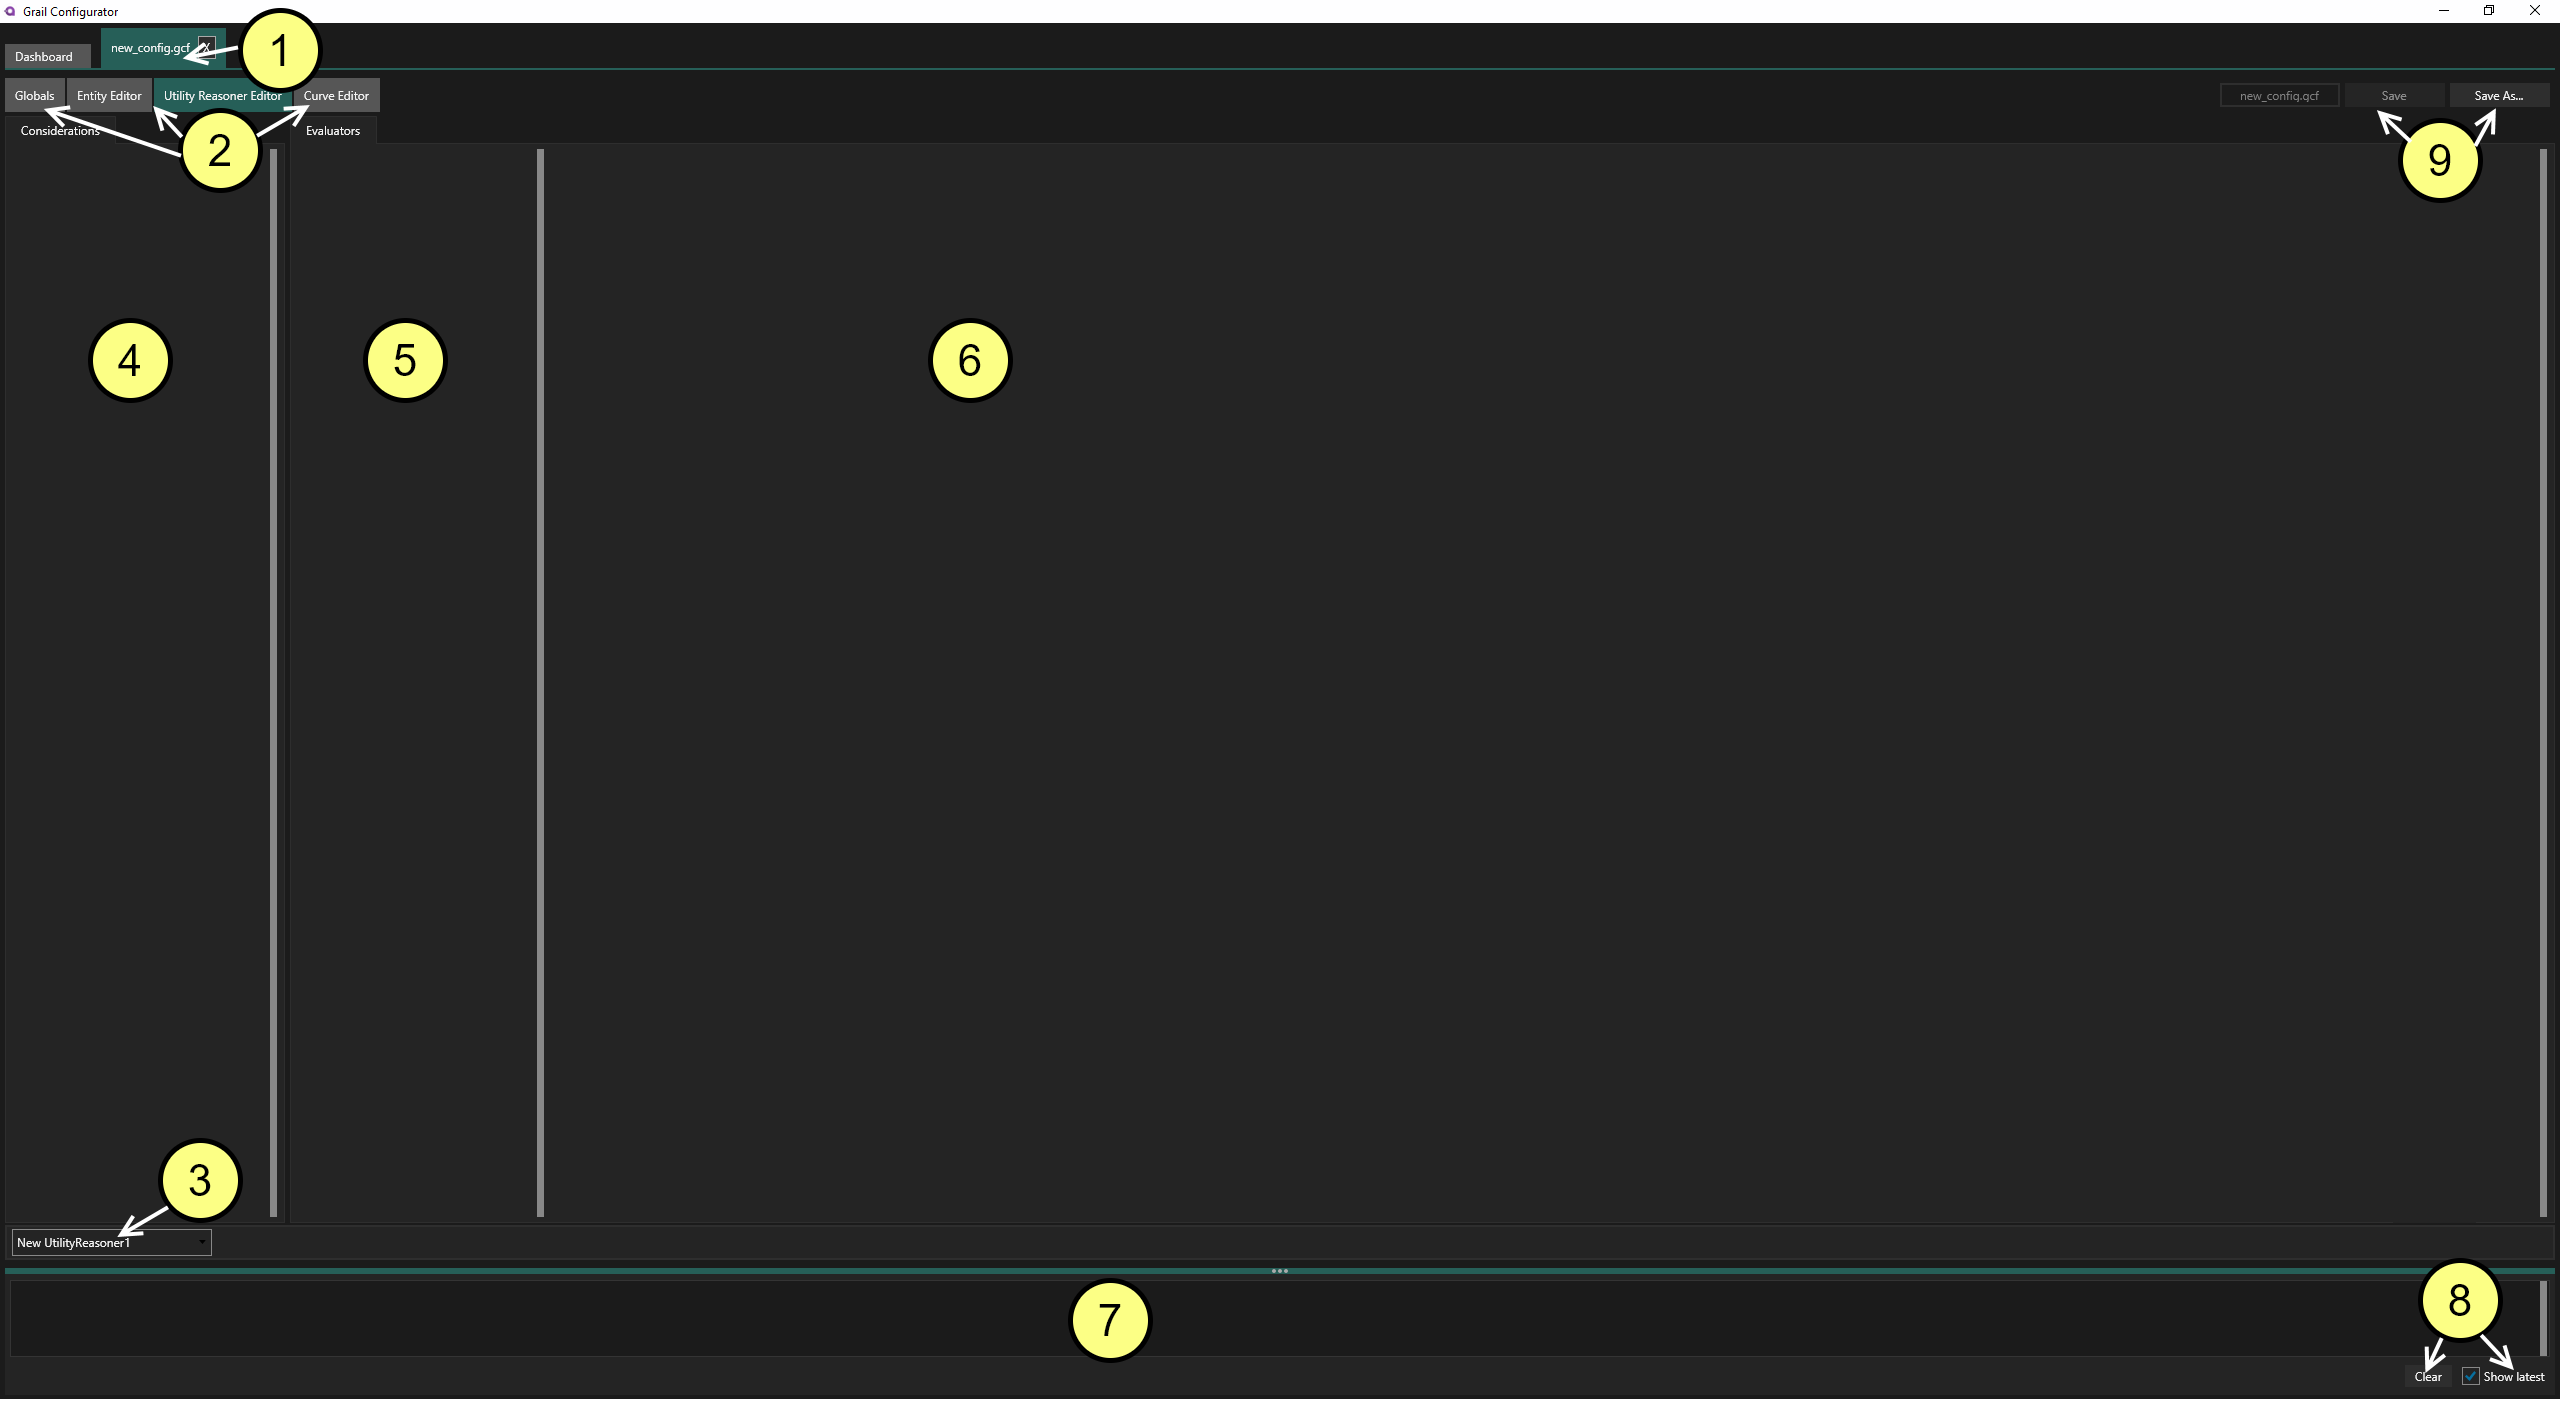
(1) File tab - you can see the opened file. You can also close it here.
(2) Editor tabs - when creating the Utility system, you will be working with all of them, but the least of the time with the Entity Editor tab. To create Entities see Entity Creation Tools.
(3) Opened Reasoner - here you select the current Entity Reasoner to work with.
(4) Considerations list - all considerations defined in the system and attached to the currently opened Entity Reasoner are listed here.
(5) Evaluators list - here behaviors will be shown with evaluators that compute their utility. You select those evaluators to see their details in panel (6).
(6) Evaluator’s detailed view - this is the place where an evaluator can be configured. You set up input considerations, modify curves and select the final evaluation method.
(7) Console - a small output log window.
(8) Console buttons - you can clear the output log here and also set the window to auto-scroll ("Show latest" checkbox).
(9) Save - click here to save the configuration to the same file it was created/opened from or click "Save As" to write it to a new file.
Create (or select) Utility Reasoner
To create a new Utility reasoner, go to the Globals tab.

In the Globals tab, click the plus (+) sign under Utility reasoners panel:
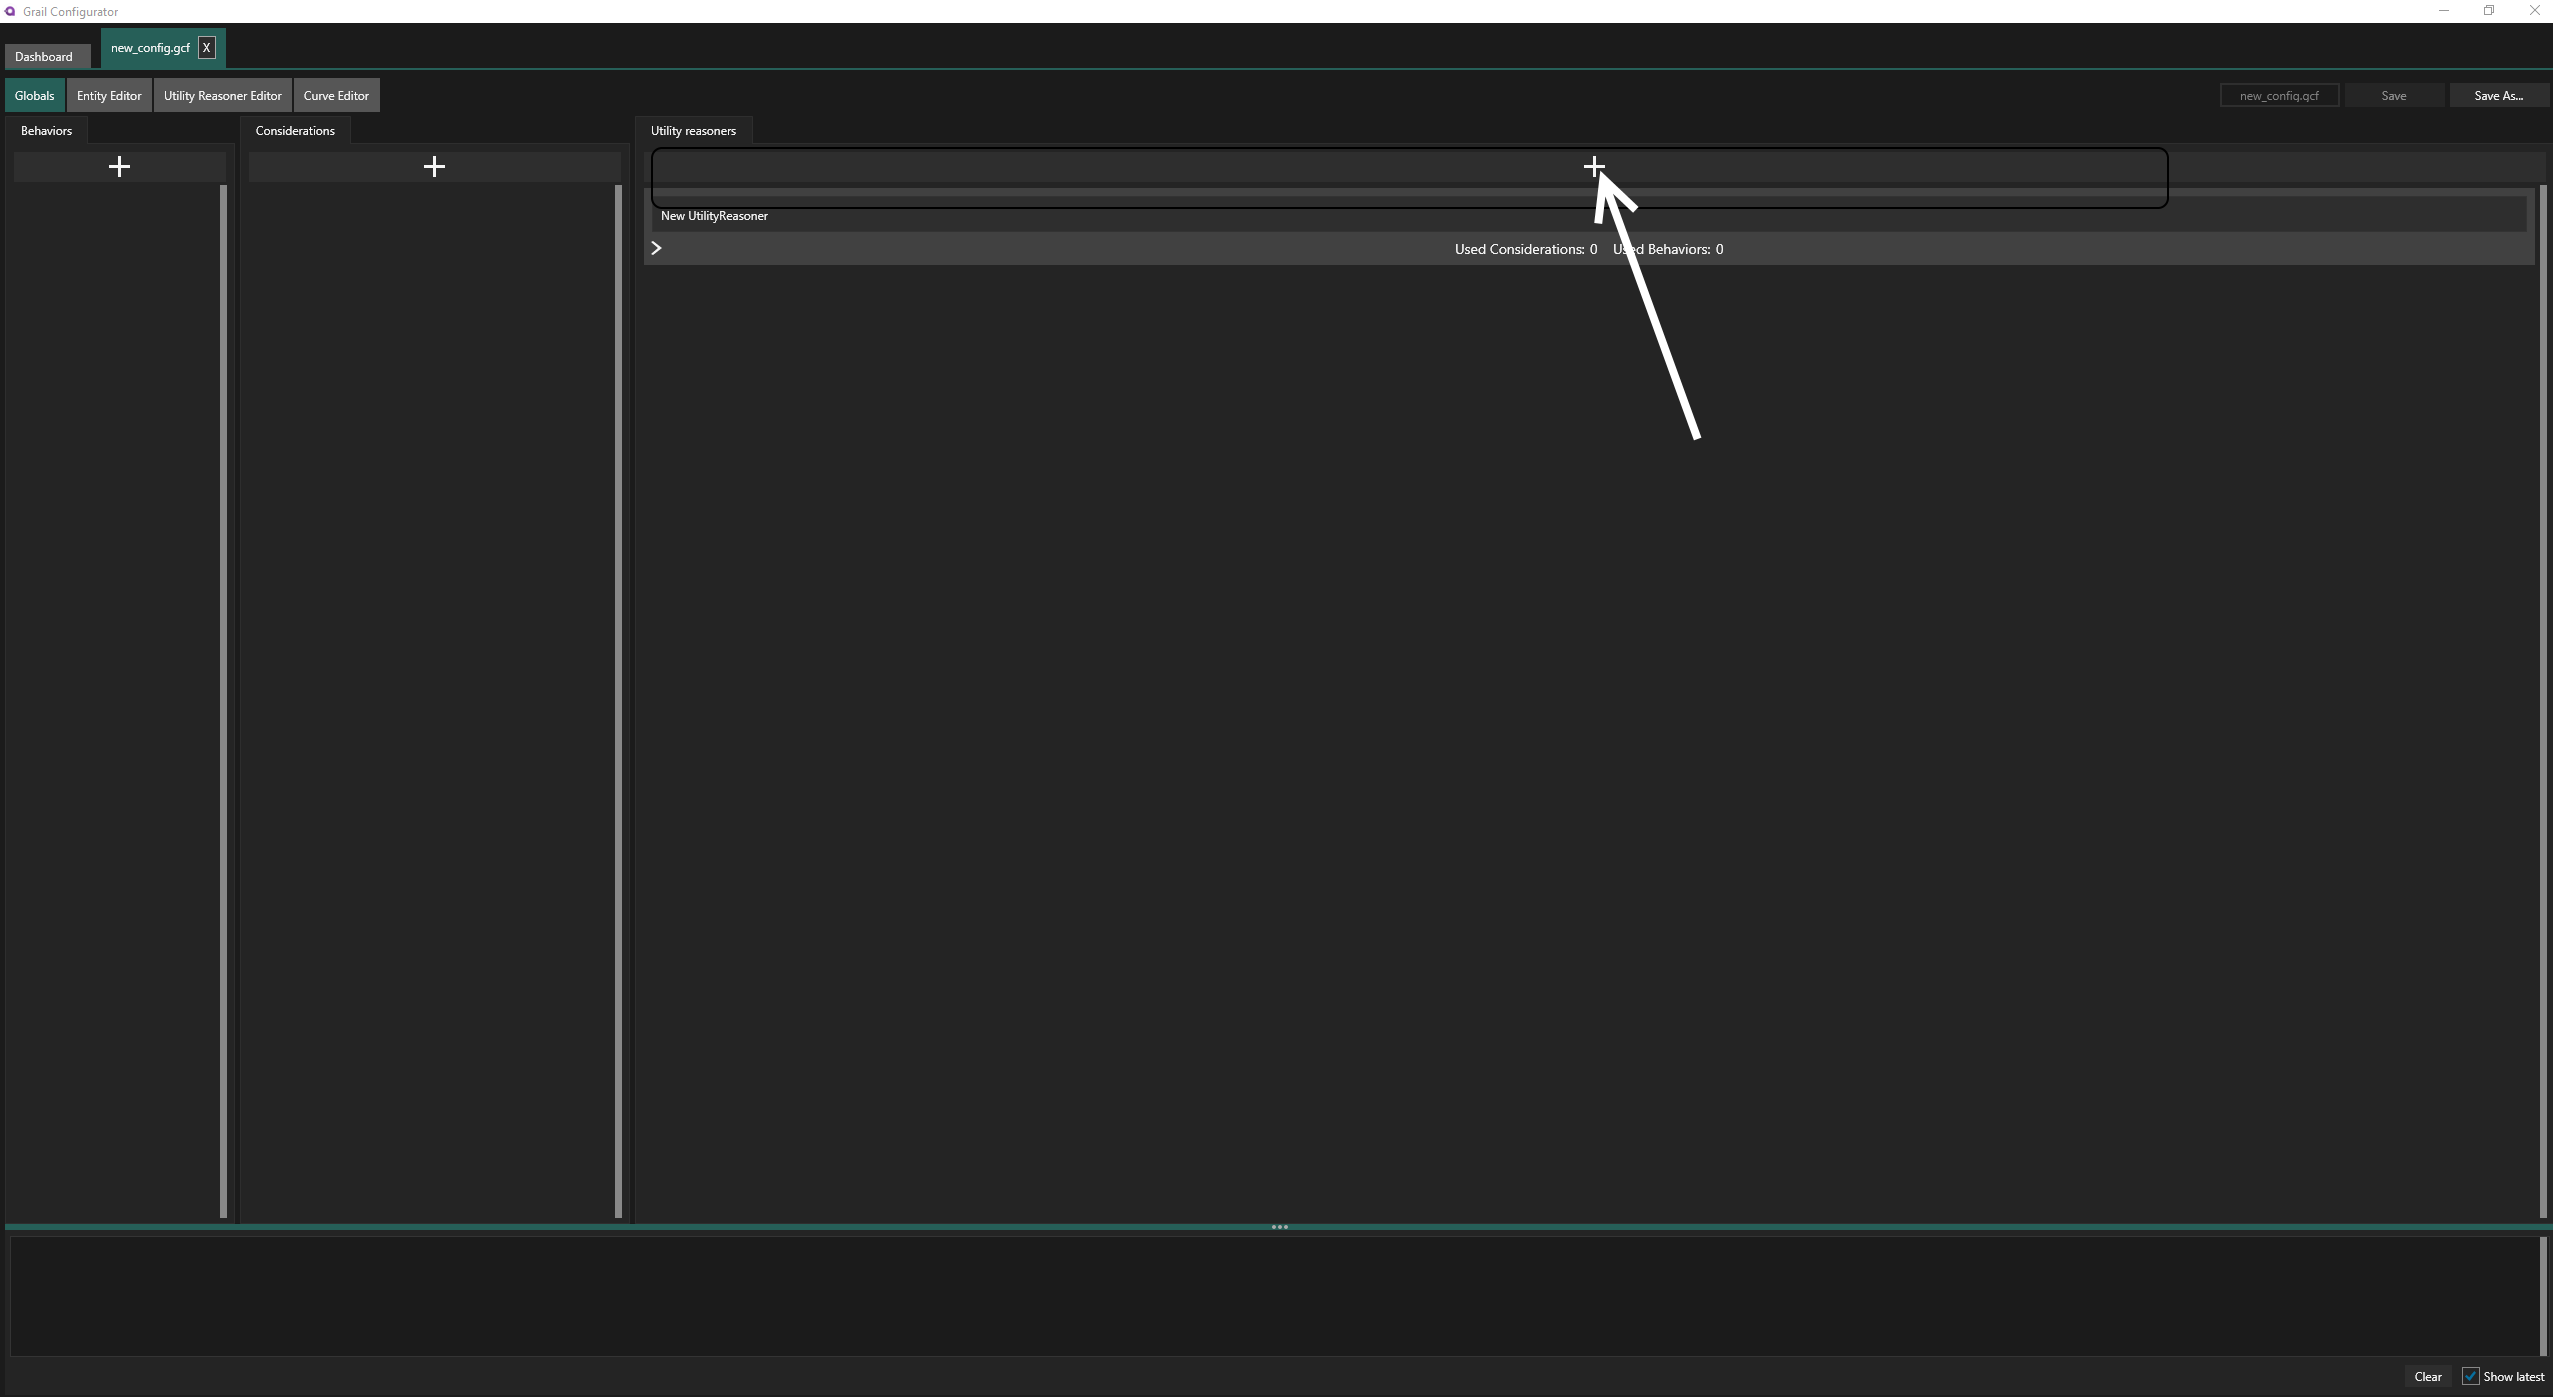
This will create a new reasoner with automatically generated name. You can edit the name to customize it to your game and it is a good idea to do it.
| If you opened an existing configuration file, there is a chance that there are some reasoners already defined. You will see them in the combo box marked by (3) in Figure 2. |
Create behaviors
Let’s create some Behaviors to work with. The Utility reasoner will be computing utility values for these behaviors, after all.
To create behaviors, click the following plus sign under the Behaviors tab.
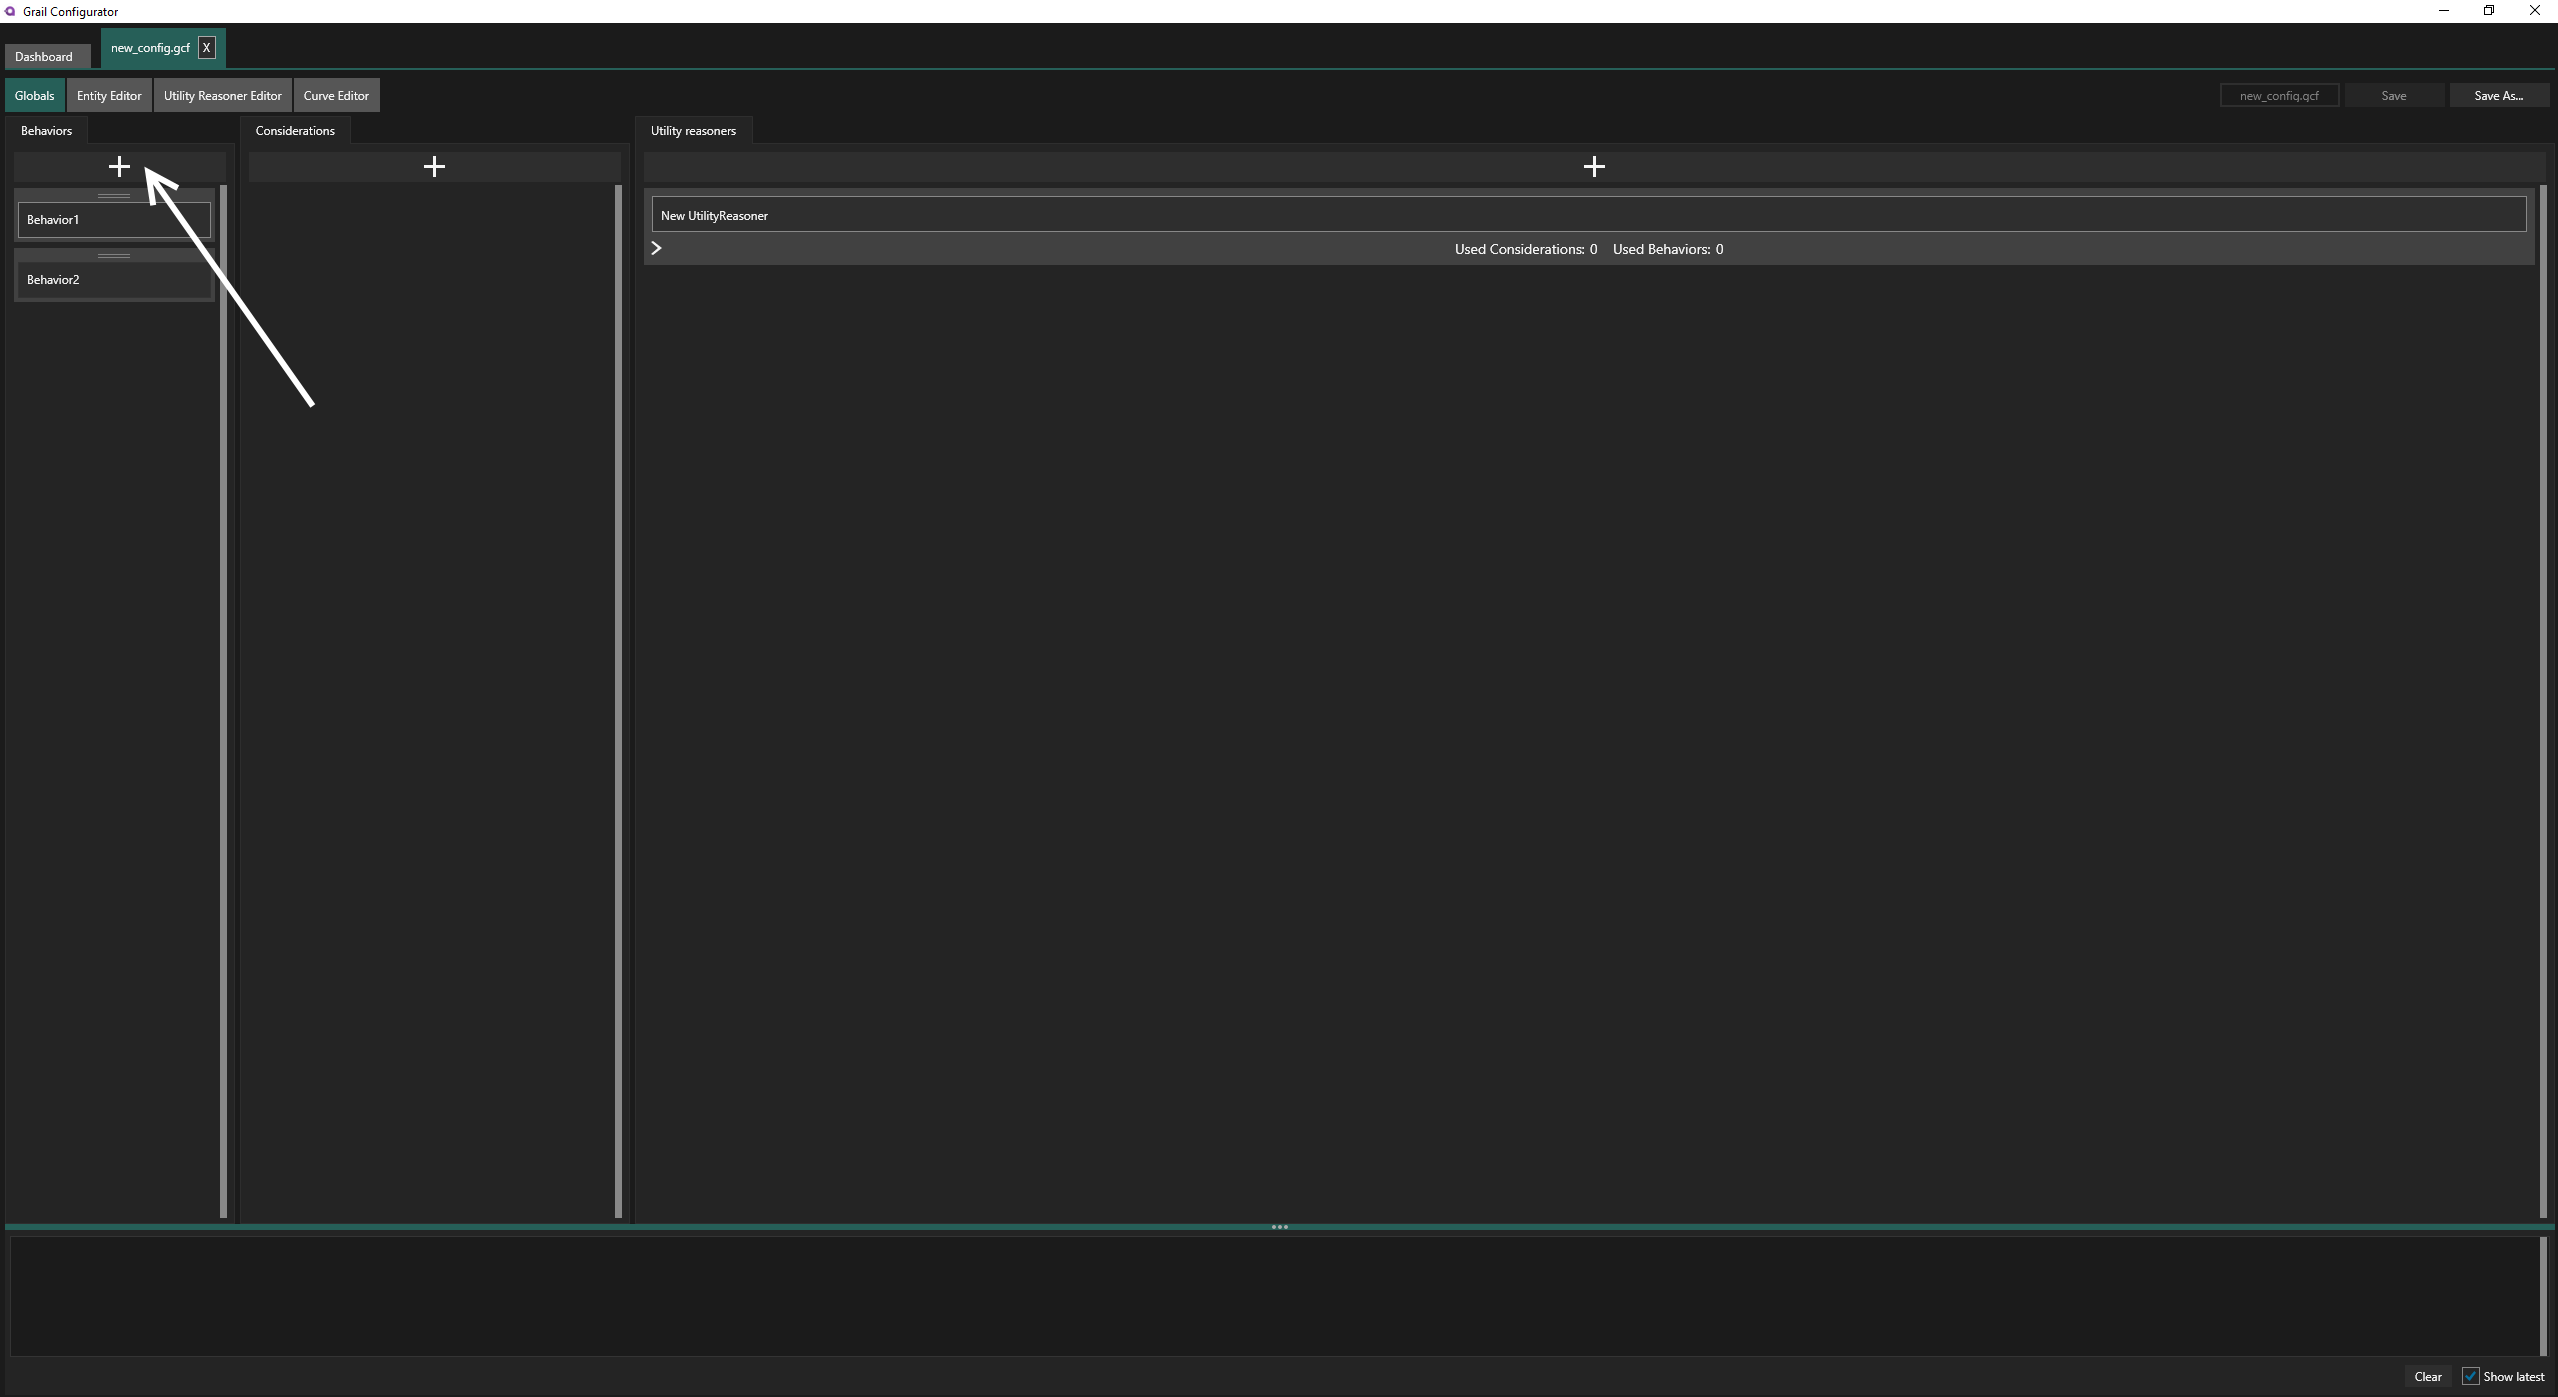
Click the newly created behavior’s name to edit it. If you load the configuration file in the game, the names will be matched with behavior prefabs defined in code, so make sure the strings are identical.
| If you opened an existing configuration file, there is a chance that there are some behaviors already defined. You will see an already populated list then. |
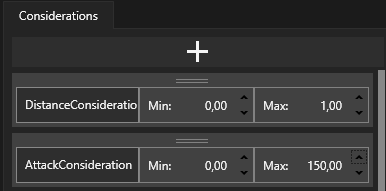
Create considerations
Now let’s create some Considerations. These are measurable factors that define the context for the decisions in Utility System. Again, click the respective button:

| If you opened an existing configuration file, there is a chance that there are some considerations already defined. You will see an already populated list then. |
You can change the names of considerations as well as ranges of their allowed values. Setting the proper interval is useful for prototyping. See section Testing the System.
If you right click the behavior, consideration or reasoner in the Globals tab, you will be asked if you want to delete it.
|
Add Behaviors and Considerations to Utility Reasoner
We want the reasoner to have access to created behaviors and considerations.
Just drag&drop them from the lists on the left-hand side to the reasoner. It will show how many considerations and behaviors are used by it.
They do not need to be used right away - let say they become available to the reasoner.
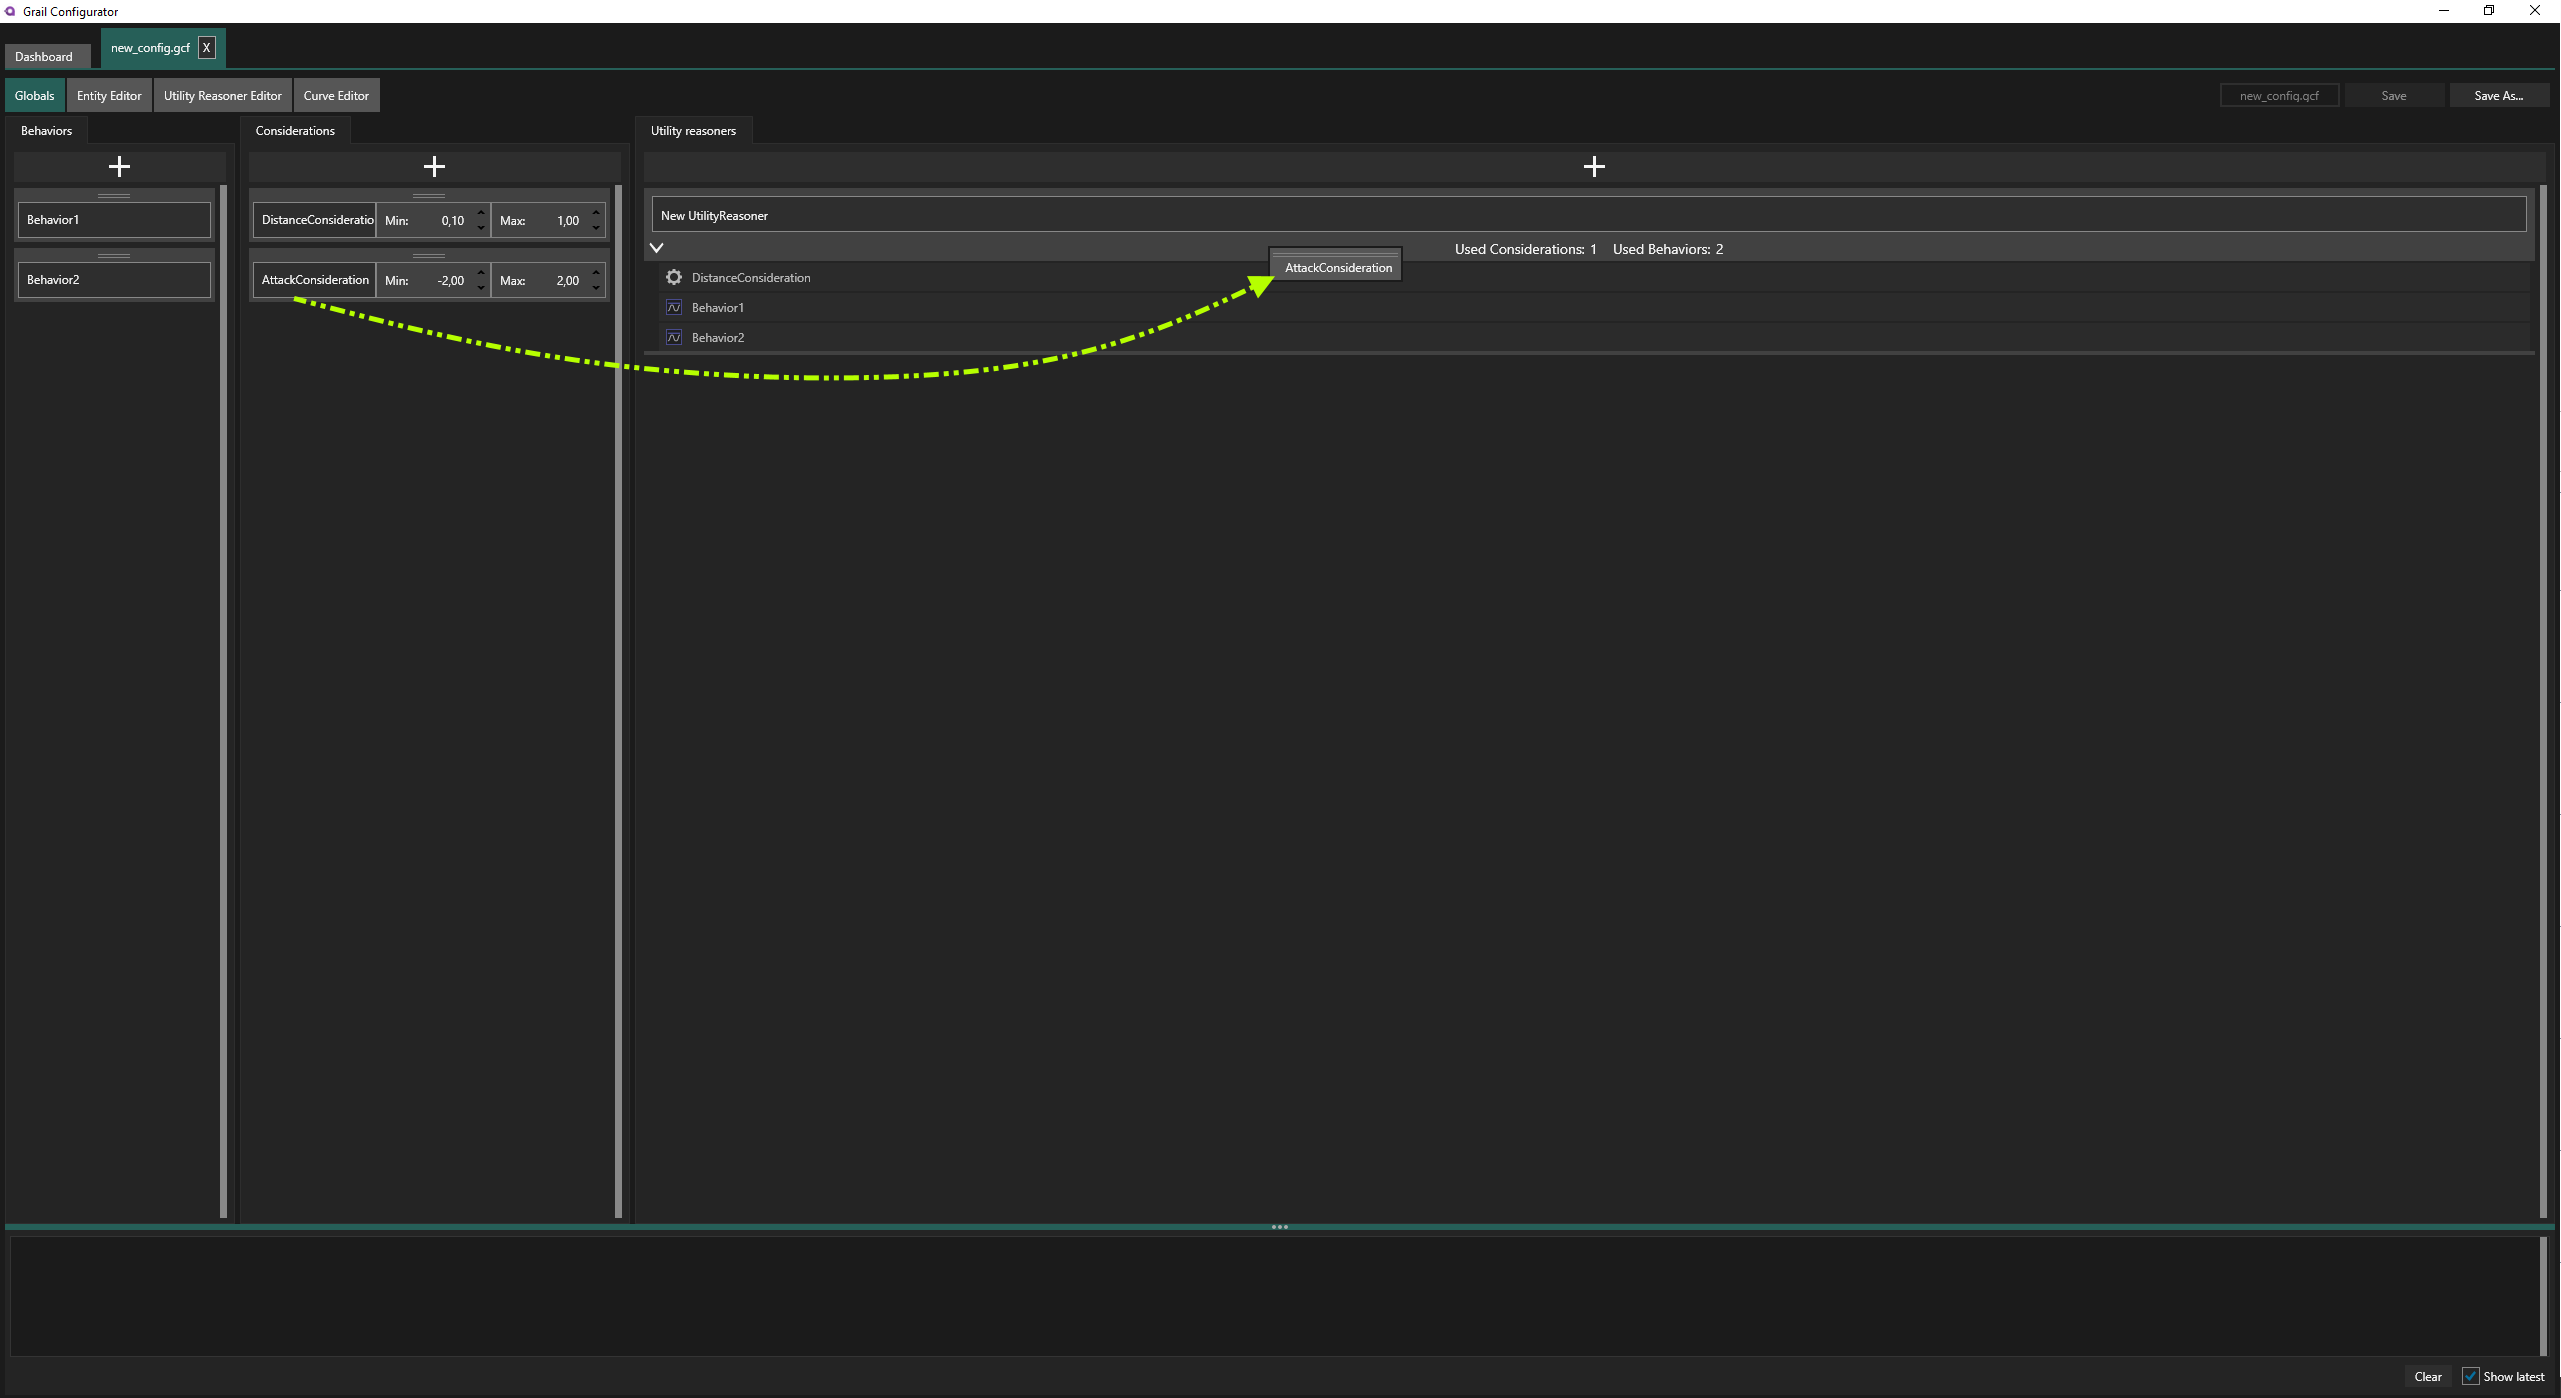
| If you opened an existing configuration file, you will see which behaviors and considerations are used by a particular reasoner. |
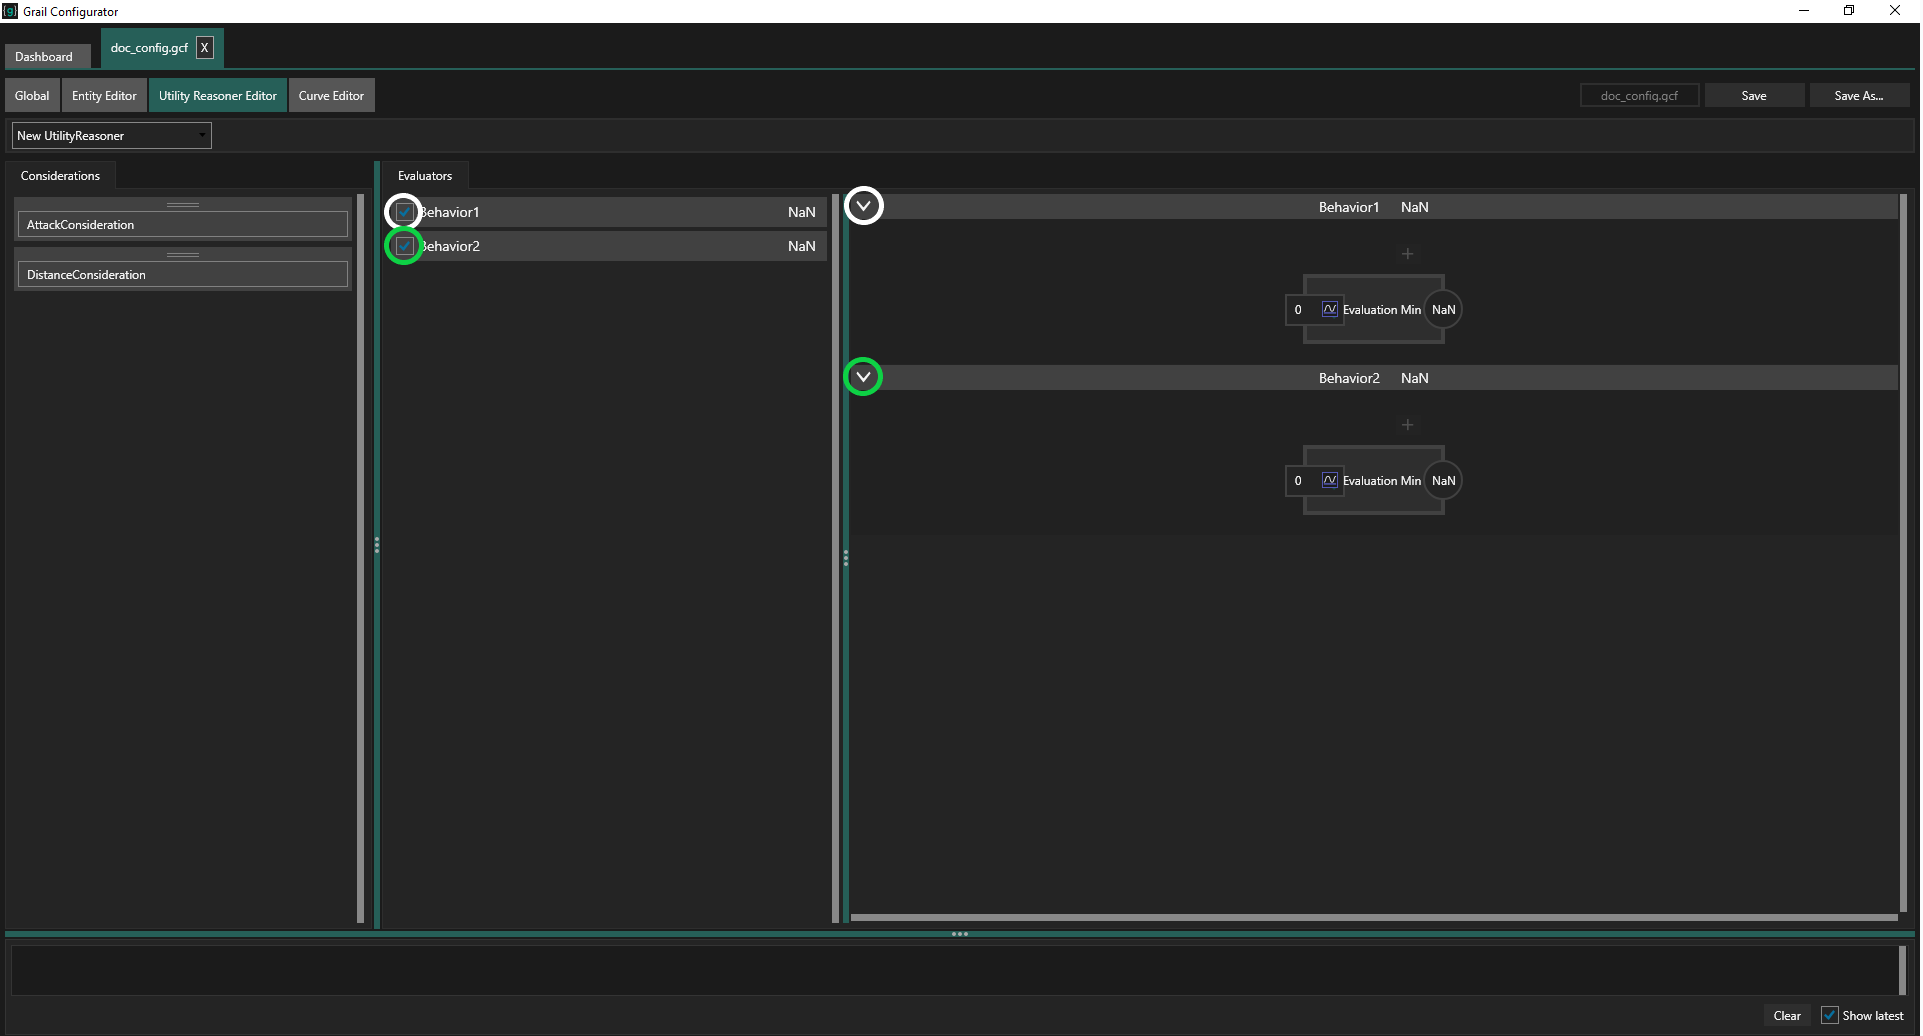
Configure Evaluators
Switch back to the Utility Reasoners Editor tab:
It is time to configure the evaluator. Select the checkbox next to a behavior to see how it is currently evaluated by the Utility Reasoner. This will open its setup in the panel to the right-hand side. When you select multiple behaviors, you will see their evaluations organized in a row-layout.
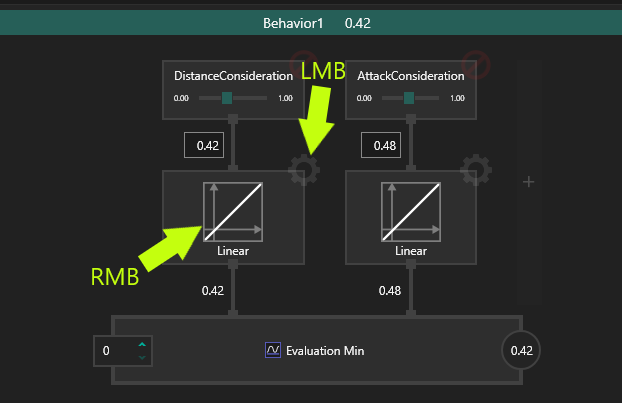
| If you click the arrows (outlined by white and green circles in Figure below) you can expand or collapse the view of the evaluation of the respective behavior. |
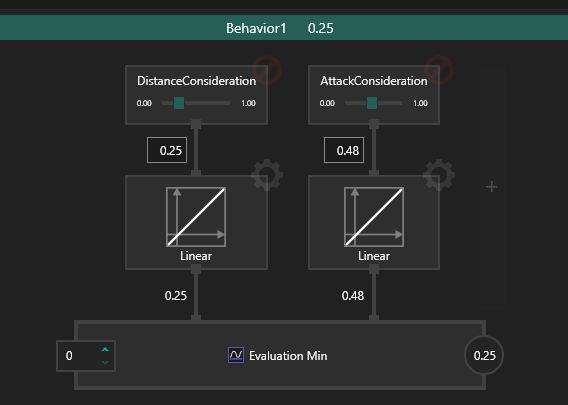
Let’s add the created considerations so they are used in evaluation of Behavior1. Click the (+) sign:
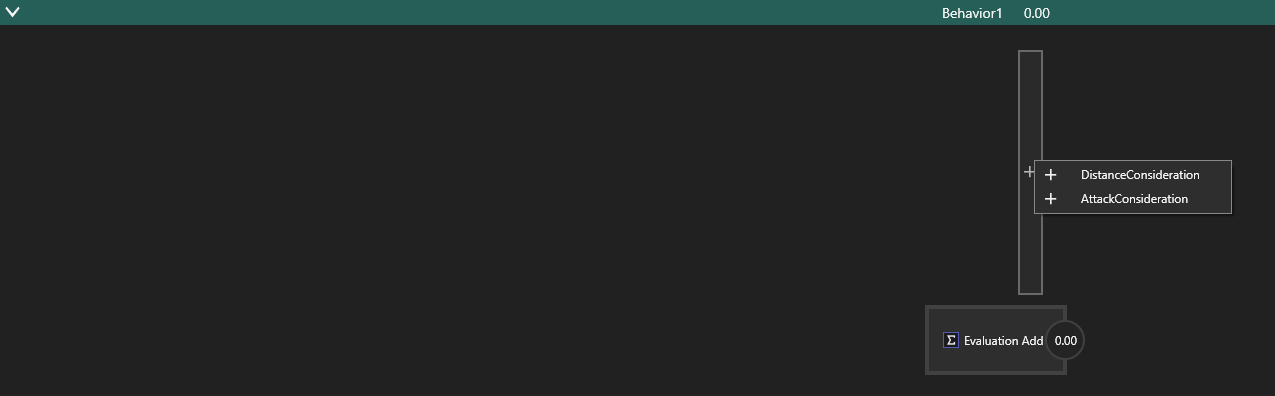
The effect shoud look as follows:
If you want to delete a consideration added to an evaluator, click the remove sign in the top-right corner of its node.
You can click the evaluation node to change it type to a different formula. In the example above, it is specifically Evaluation Add.
Currently, Grail supports the following methods of combining scores from multiple curves: Max, Min, Average, Multiply, Add.
Configure Curves
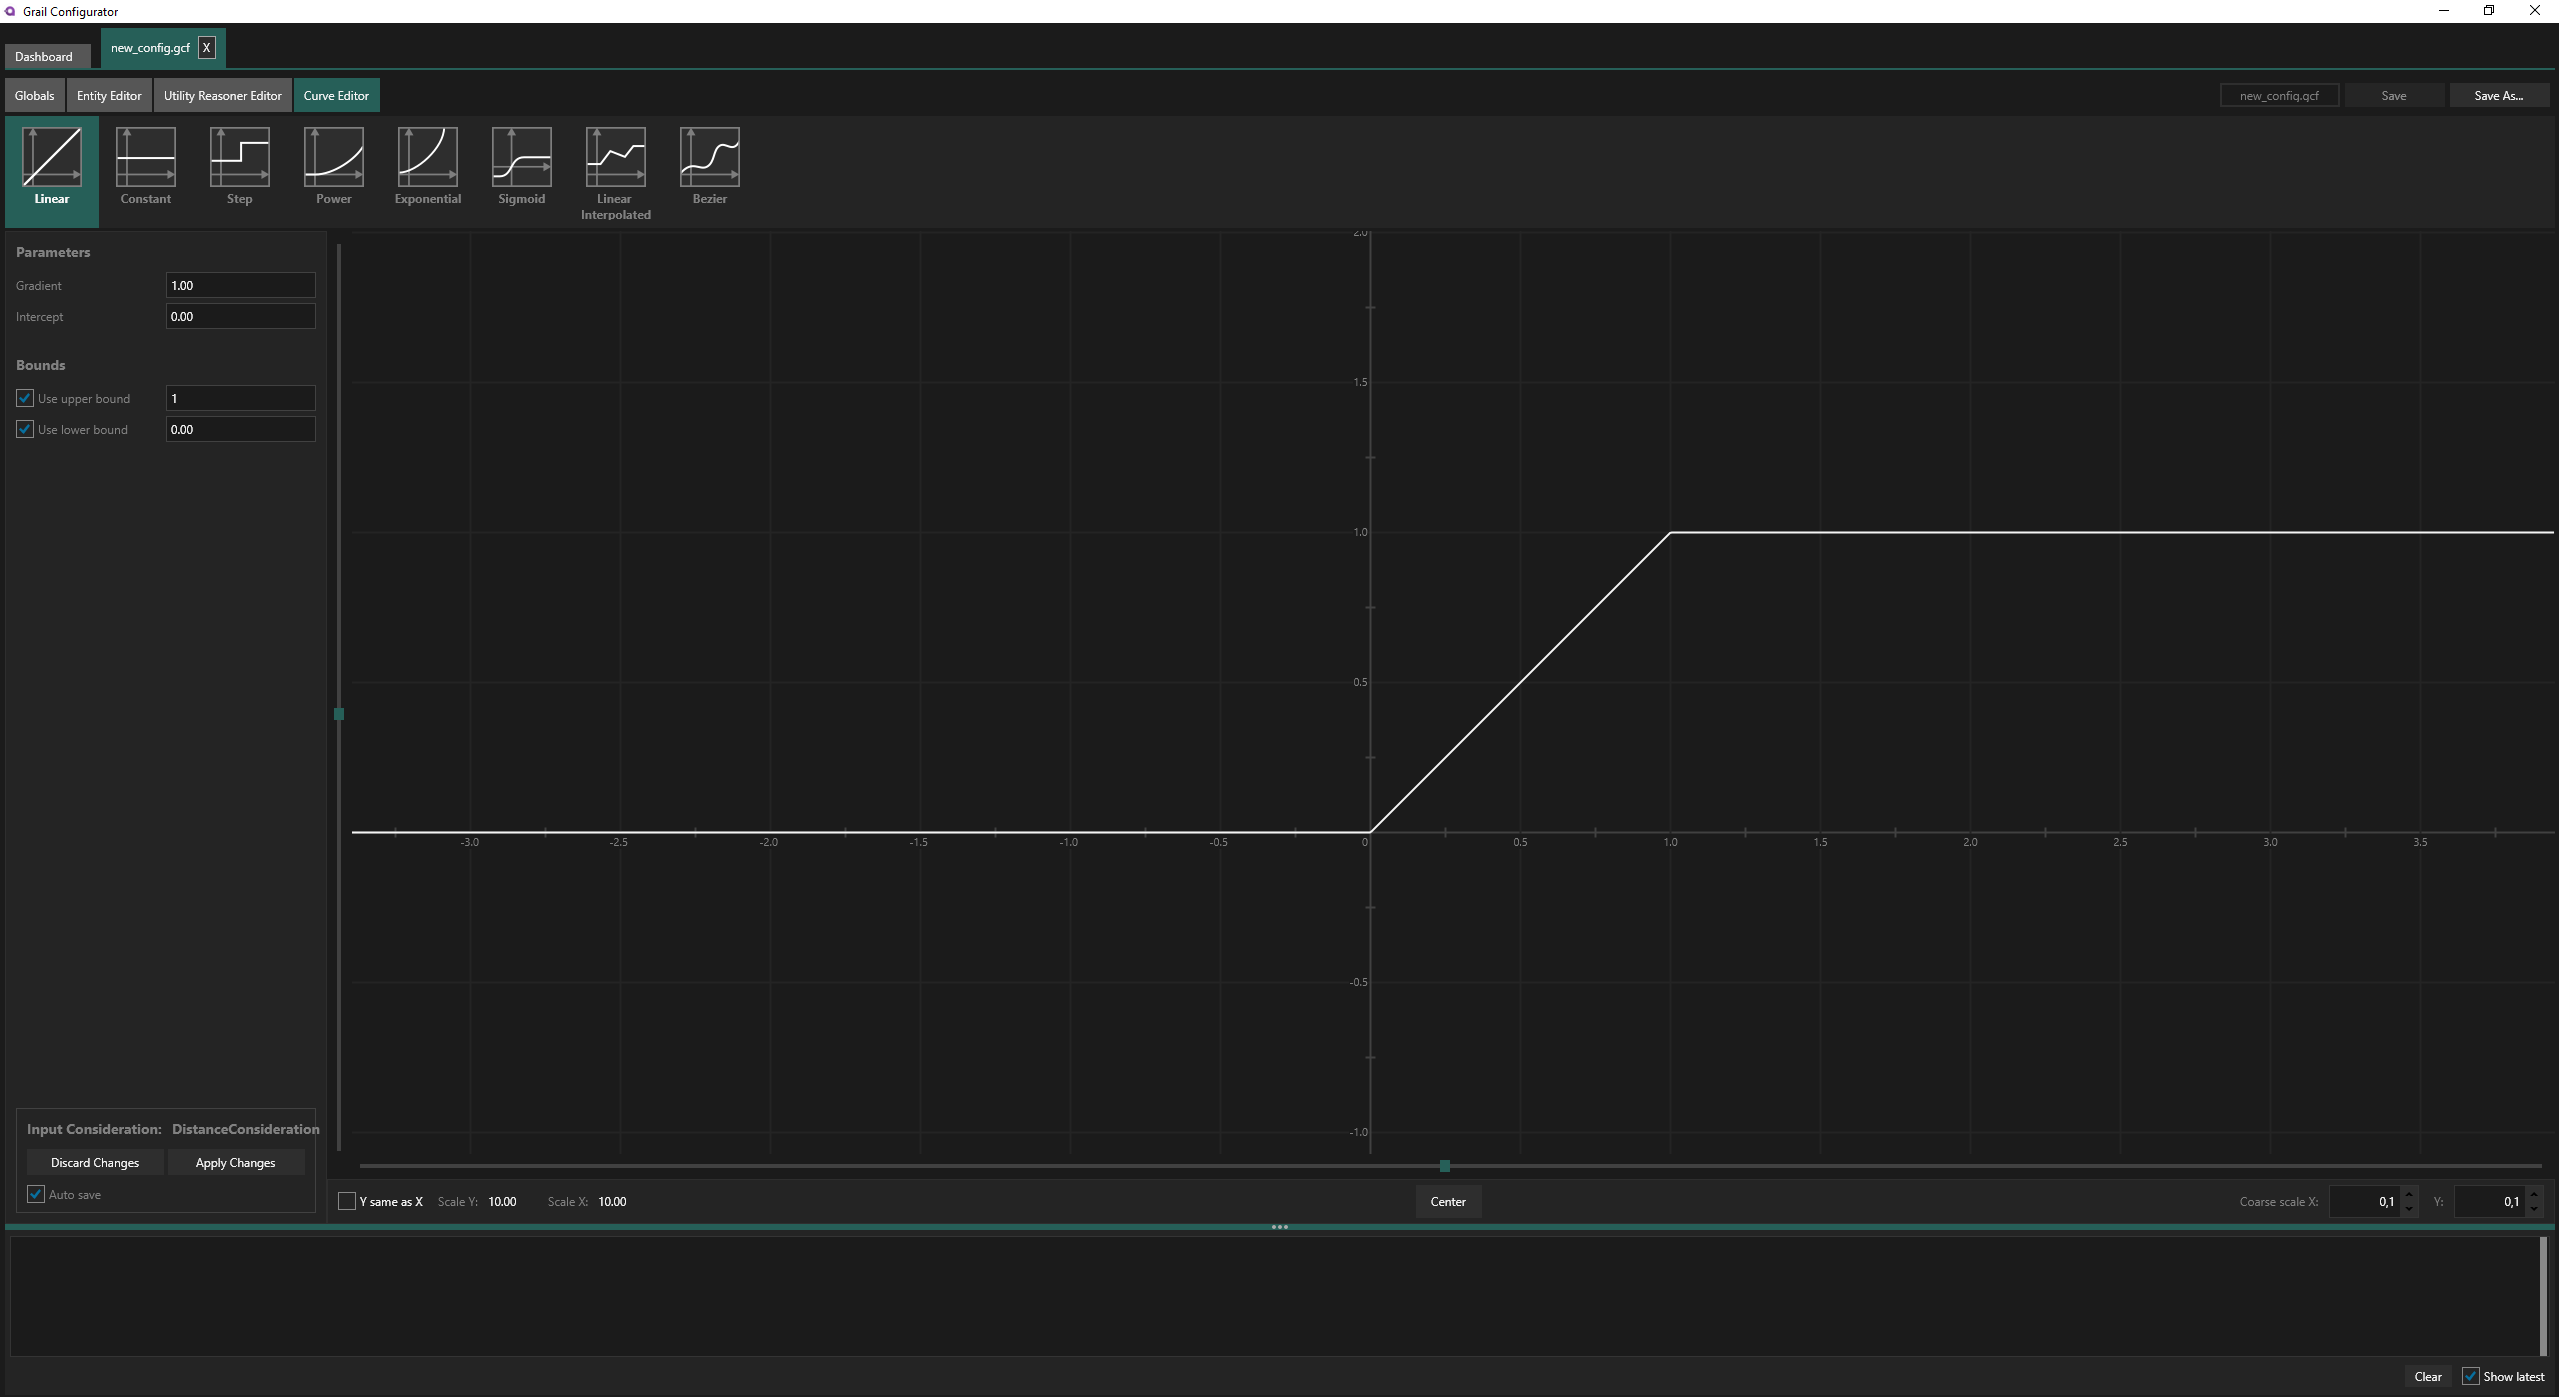
The fun part is to configure utility curves! You can right-click the curve symbol to change its type, but to enter the fully-fledged curve editor click the cogwheel in the top-right corner. This will enable you to customize the response curve, which transforms input from a consideration and plugs it in the evaluation.

(1) Curve type selector - here you can select the base type for your curve. It’s the first thing you should do.
Currently, Grail supports the following types of curves: Linear, Constant, Step curve, Power curve, Exponential, Sigmoid, Linear interpolated curve, and Bezier curve.
(2) Curve parameters - this is a context-based panel that is specific to the chosen curve’s type. You can enter its parametrization here. For example: the Step curve allows you set where the step is (Threshold parameter) and what values the curve takes before and after this step.
(3) Curve view - the curve is plotted here, so you can analyze what values it takes for a given X. Some curves, i.e. Linear interpolated and Bezier, can be edited here.
For example, when working with interpolated curves, you can drag&drop points such as the one next to the (3) mark in Figure 14. If you drag a point past another one (in the X axis), then you will be dragging that point instead.
(4) Scaling ver1 - you can see the scale for the plot. This is just for viewing convenience. By default the scaling is equal in both X and Y directions. If you want to change it, uncheck the Y same as X box. This will make the scaling slider appear for Y axis too.
(5) X scaling slider - you can use this slide to scale the view along the X axis.
(6) Scaling ver2 - you can also enter a multiplier for the scale in X and Y axes, respectively. This is just for viewing convenience. For example, if you change the scale X from 1 to 10 you will zoom out the plot 10 times.
(7) Save or discard - when you are done with editing the curve you should apply changes here.
| Don’t forget to save your curve. |
The image below shows a different type of curve - linear.
Notice how the parameters panel changed. For a linear curve you select gradient (slope) and intercept (crossing with the Y axis). In addition, you can optionally introduce fixed lower and upper bounds.
Testing the System
You can quickly prototype the Utility system you configure.
-
Consideration sliders- each consideration block in each evaluator panel has its own slider that allows you to set its value in the allowed interval. It is worth remembering that you can configure the min and max limit in theGlobalstab, where you create configurations. This way you can emulate the game state in a simplified fashion. You can test whether the system meets your expectations. -
Flow of values- notice how the values highlighted in the picture below change as your tinker with the sliders. -
The winning behavior- the best behavior, i.e. that will be chosen in the current state, is distinguished by a lighter color. Observe whether it changes as you move the sliders or change components of the Utilty system.
Testing Utility System is a similar process to debugging. Here is the manual page for Utility Debugger.

Utility Reasoner assignment
This topic is covered in tutorial: Entity Creation Tools.
You can drag the reasoner onto an entity in the Entity Editor tab.
Using the Configuration in your Game
In order to use the system created in this editor, save it to the configuration file and load it in your game. The save button is in the top-right corner, depicted by (9) in Figure 2. Please go through the following tutorial: Configuration Loading.