Unreal Engine Plugin Quickstart
This page will present you with simple steps you need to take in order to integrate Grail with your Unreal Engine project and create a simple agent using Grail’s Utility Reasoner.
1. Prerequisities
The project should start out of the box in Editor on Windows. If you need it to run on another platform or you’re packaging the project, see Plugin Compilation page.
2. Importing the Plugin
To start off, you simply need to put the contents of our plugin in the Plugins/ directory inside your project structure.
Then locate the project file (MyProjectName.uproject), right click on it and select Generate Visual Studio project files.
This operation will also automatically build Grail from source.
Now you can build and launch your project.
3. Creating a Configuration File
The first step of creating a Grail agent is making a configuration file. In this tutorial, we’ll go through creating an agent based on Utility AI. We assume that you are familiar with Grail Tool, especially Utility Creation Tools.
3.1. Adding a Utility Reasoner
Open Grail Tool and select Create new project.
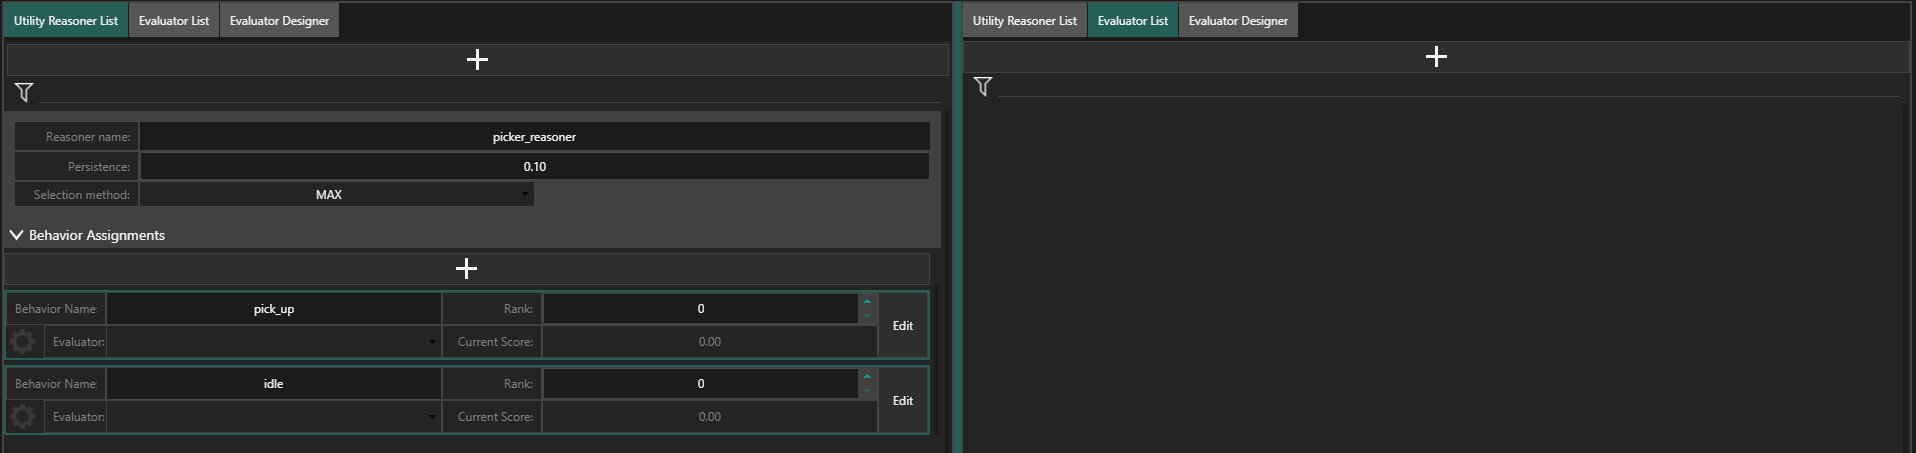
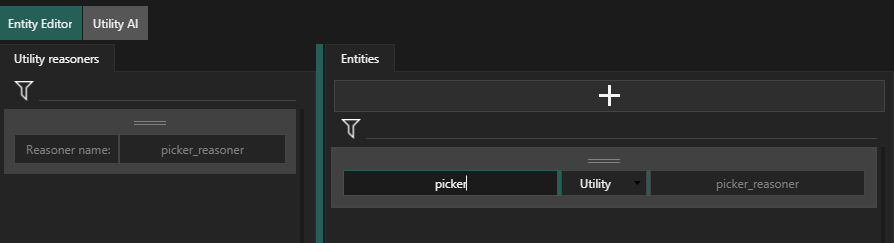
Switch to Utility AI tab, select Utility Reasoner List and add a new reasoner by clicking on the plus button.

3.2. Adding Behaviors
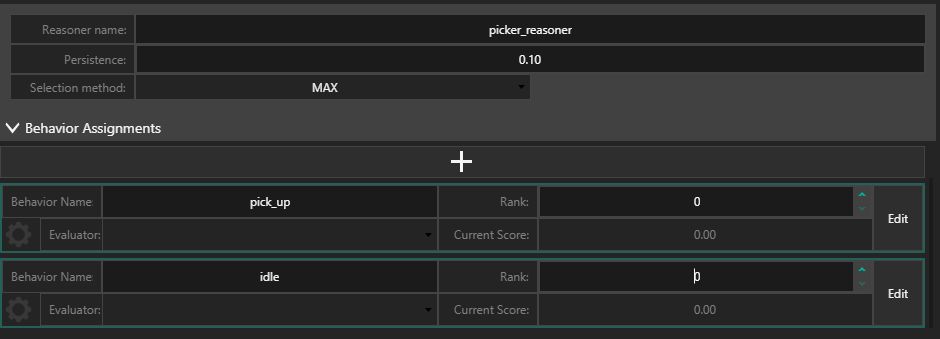
Let’s say that we want our agent to be able to pick up items or wait. In the newly created utility reasoner’s panel, add two behaviors by clicking on the plus button and assign names to them - pick_up and idle. Let’s also name our reasoner picker_reasoner. In this tutorial, we leave the reasoner’s parameters unchanged. For more info on those, see the Utility Reasoner page.
3.3. Creating Behavior Evaluators
To add evaluators to our newly created behaviors, switch the right column view to Evaluator List.
Now create two new evaluators - pick_up_evaluator and idle_evaluator - by clicking on the plus button.

3.3.1. Idle Behavior Evaluator
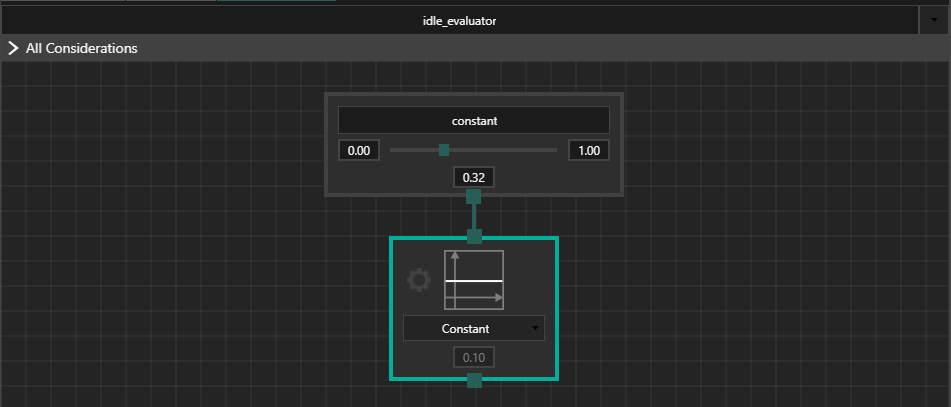
Click on the Edit buton on idle_evaluator's entry. This will take you to the Evaluator Designer view. Because we want the idle behavior to be executed only if there’s nothing better left to do, we’ll assign to it a mock consideration returning some constant value and a constant utility curve returning 0.1, regardless of its input.
3.3.2. Pick Up Behavior Evaluator
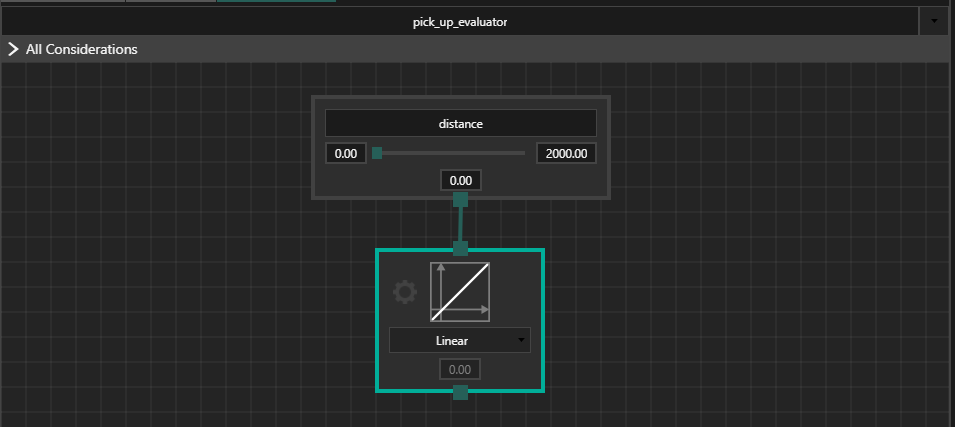
We want our agent to intelligently select between the items that it picks up. For simplicity’s sake, we’ll use only one consideration - the distance from the item.
Let’s start by creating the basic evaluator, containing the consideration and a single utility curve.
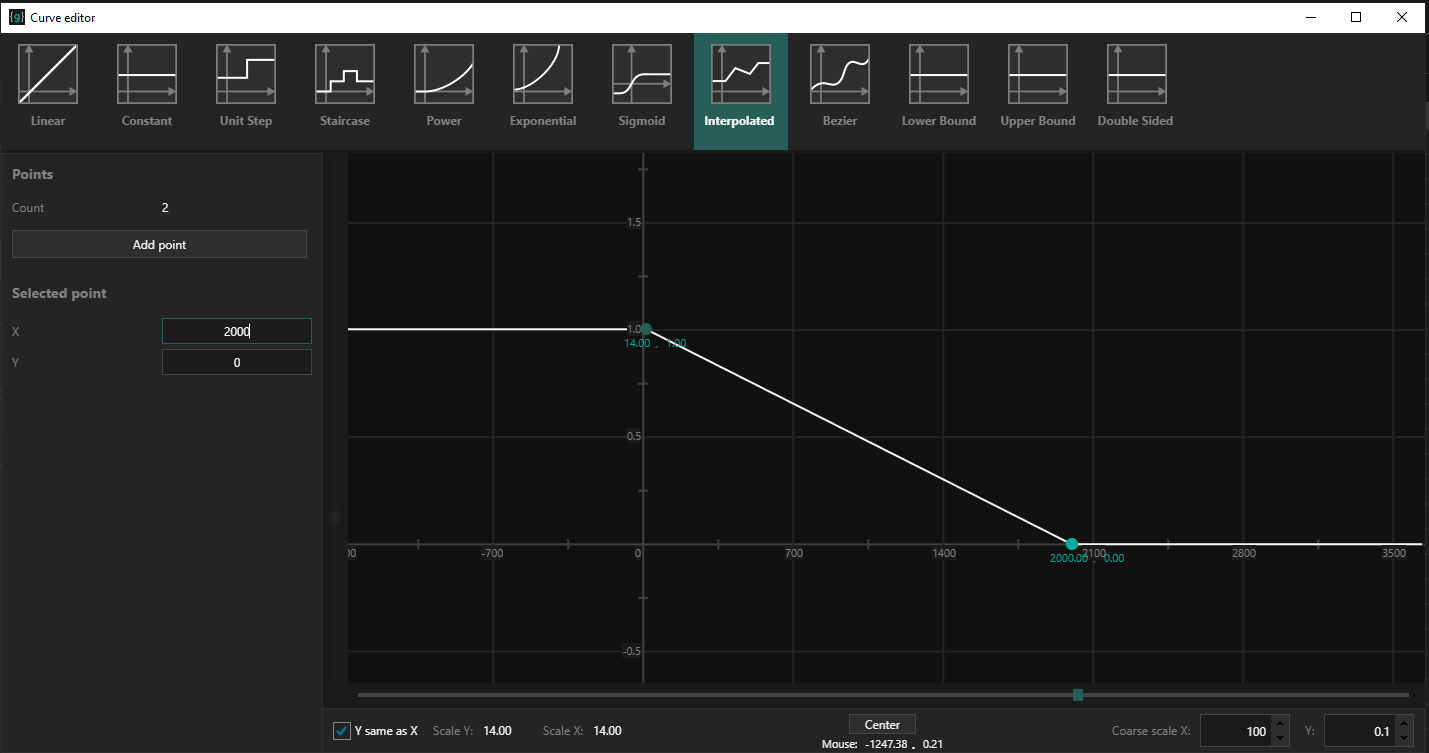
Now we want this curve to reflect our agent’s preference to pick up items that are nearby. Open the curve editor and modify the utility curve to decline with distance.
3.4. Assigning Evaluators to Behaviors
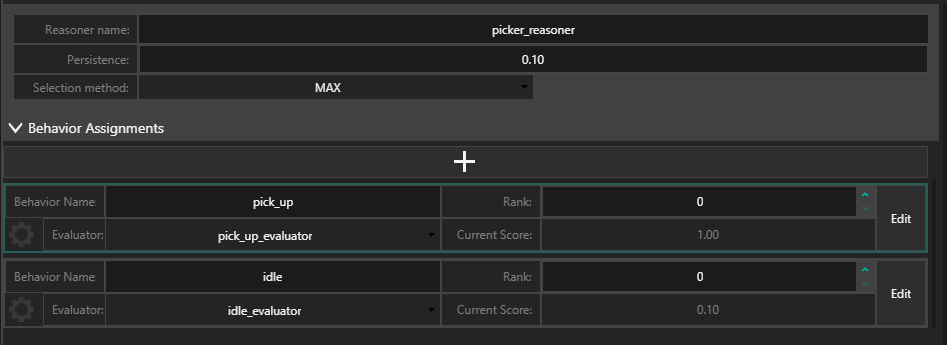
Now we can assign the evaluators to their respective behaviors in the reasoner panel.
4. Setting Up Grail in Unreal
Now that we created a proper configuration, we can proceed to set up Grail in the project itself.
4.1. Grail Configuration Loader
UGrailConfigurationLoader class allows us to load a configuration file and store its content in a format understandable for the rest of the plugin.
To define your own configuration loader instance, simply derive a blueprint class from UGrailConfigurationLoader and enter the path to your configuration file in the Configuration File Path` text field.
After entering the path, click on the _Reload data button and then compile the blueprint.
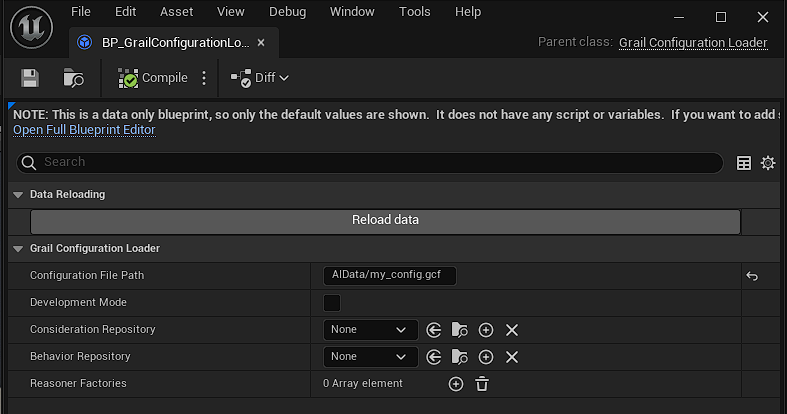
4.1.1. Development Mode
If you want the configuration to automatically reload each time you enter a PIE session, you can enable the Development Mode checkbox. However, keep in mind that you’ll still have to manually reload configuration data if you want the changes to be reflected in the packaged game.
4.2. Consideration Repository
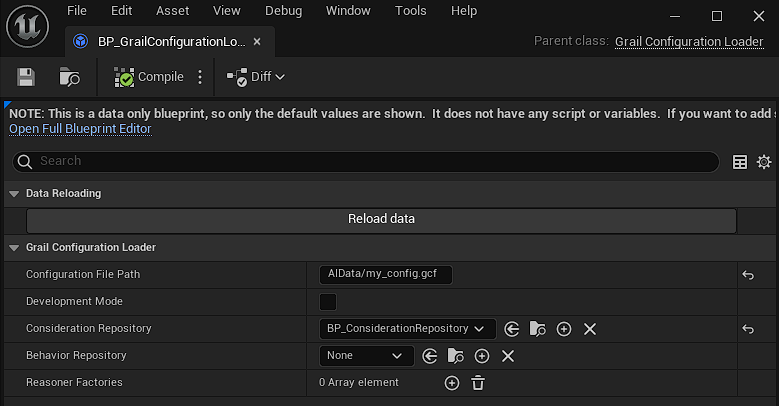
As you probably noticed, the configuration loader has two more fields that are not yet assigned any values. The first one is Consideration Repository.
Consideration Repositories are responsible for matching consideration implementations to string keys that you defined in the configuration file.
Consideration implementation will be described in more detail below, but for now we’ll simply create an empty repository.
Right-click on the project window, select Blueprint Class and choose UConsiderationRepository as the base class.
Let’s call the new blueprint BP_ConsiderationRepository and assign it to our configuration loader’s Consideration Repository property.
4.3. Behavior Repository
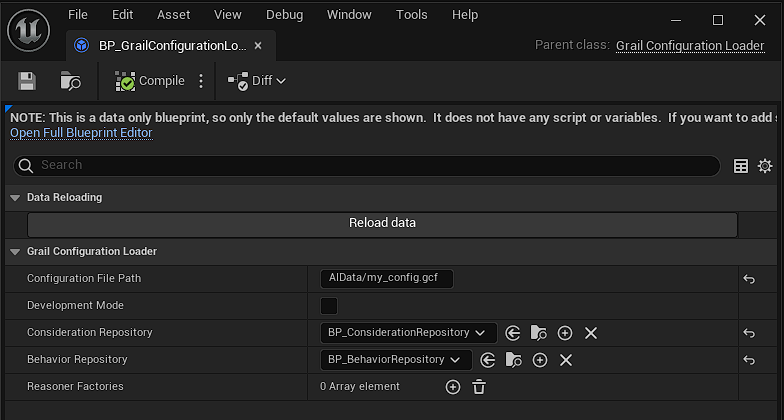
Our next task is creating a Behavior Repository.
Behavior Repositories are responsible for matching behavior implementations to string keys that you defined in the configuration file.
Right-click on the project window, select Blueprint Class and choose UBehaviorRepository as the base class.
Let’s call the new blueprint BP_Behavior Repository and assign it to our configuration loader’s Behavior Repository property.
4.4. Implementing Behaviors and Behavior Providers
Let’s move on to the behavior implementation part.
To provide our agent with the ability to pick up objects, we need to override Grail’s Behavior class and create a new behavior called PickUpBehavior .
The best way to learn about behaviors is to read this article.
Let’s assume that we have a special Actor class - APickable that represents a pickable item.
Let’s also assume that the class has a single public method, PickUp that we want to call as soon as our character is close enough.
Add a new C++ class and fill it with the following code.
For readability, we’re placing function definitions in the same code snippet.
In a real project, you’d probably want to have a separate header file for the declaration of the class.
class PickUp : public grail::Behavior
{
public:
  PickUp(APickable* Pickable)
    : Pickable{Pickable}
  {
  }

  virtual void Start(grail::AIEntity& owner) override
  {
    //The behavior assumes that the AI Controller is added to the entity's blackboard
    AAIController* EntityController = owner.GetBlackboard().GetValue<AAIController*>(EntityBlackboardKeys::AI_CONTROLLER);

    //Move to the pickable's location
    UAIBlueprintHelperLibrary::SimpleMoveToLocation(EntityController, Pickable->GetActorLocation());
  }

  virtual void Update(grail::AIEntity& owner, float deltaTime) override
  {
    const AAIController* EntityController = owner.GetBlackboard().GetValue<AAIController*>(EntityBlackboardKeys::AI_CONTROLLER);

    //If you're too far away, don't do anything
    if (FVector::Dist2D(EntityController->GetCharacter()->GetActorLocation(), Pickable->GetActorLocation()) > 120.0f)
    {
      return;
    }


    //Pick up the item and change the value of the flag
    Pickable->PickUp();
    bWasPickUpCalled = true;
  }

  virtual bool IsFinished(const grail::AIEntity& owner) const override
  {
    // The behavior should be considered finished after picking up the item
    return bWasPickUpCalled;
  }

  virtual std::string GetName() const override
  {
    return "pick_up";
  }

private:
  APickable* Pickable;
  bool bWasPickUpCalled = false;
};
Following that, we need to create a Behavior Provider for this behavior.
UBehaviorProvider is an abstract class which requires us to implement GetBehaviorName, ProduceContext and ProduceInstance methods, which should allow Grail’s Utility Systems to create behavior blueprints and instantiate behaviors in runtime.
class MYGAME_API UPickUp : public UBehaviorProvider
{
  GENERATED_BODY()

protected:
  virtual std::string GetBehaviorName() const override
  {
    return "pick_up";
  }

  virtual std::vector<grail::EntityBlackboardPair> ProduceContext(const grail::AIEntity& Entity) const override
  {
    std::vector<grail::EntityBlackboardPair> Contexts;
    const TArray<APickable*>& Pickables = *Entity.GetBlackboard().GetValue<const TArray<APickable*>*>("pickables");
    for (APickable* Pickable : Pickables)
    {
      grail::Blackboard Blackboard;
      Blackboard.SetValue("pickable", Pickable);
      Blackboard.SetValue("location", Pickable->GetActorLocation());
      Contexts.emplace_back(grail::EntityBlackboardPair{&Entity, Blackboard});
    }

    return Contexts;
  }

  virtual std::unique_ptr<grail::Behavior> ProduceInstance(const grail::EntityBlackboardPair& Context) const override
  {
    return std::make_unique<PickUp>(Context.second.GetValue<APickable*>("pickable"));
  }
};
Be sure that the name returned by GetBehaviorName EXACTLY matches the name provided in the configuration file.
Otherwise, the plugin won’t be able to properly provide this behavior to AI Entities.
|
Now we need to do something similar for the idle behavior.
class Idle : public grail::Behavior
{
  virtual void Start(grail::AIEntity& owner) override
  {
    UE_LOG(LogTemp, Log, TEXT("Starting idle behavior"));
  }

  virtual void Update(grail::AIEntity& owner, float deltaTime) override
  {
  }

  virtual bool IsFinished(const grail::AIEntity& owner) const override
  {
    return false;
  }

  virtual std::string GetName() const override
  {
    //this name is used as a display name in debug data
    return "idle";
  }
};
class MYGAME_API UIdle : public UBehaviorProvider
{
GENERATED_BODY()
protected:
virtual std::string GetBehaviorName() const override
{
return "idle";
}
virtual std::vector<grail::EntityBlackboardPair> ProduceContext(const grail::AIEntity& Entity) const override
{
//A single context is returned as there's always only one variant of the idle behavior
return std::vector<grail::EntityBlackboardPair> { {&Entity, grail::Blackboard{}}};
}
virtual std::unique_ptr<grail::Behavior> ProduceInstance(const grail::EntityBlackboardPair& Context) const override
{
return std::make_unique<Idle>();
}
};4.5. Adding Behaviors to the Behavior Repository
As we now have our behaviors defined, we can add them to the Behavior Repository that we created before.
Simply open the Behavior Repository’s blueprint editor and add both UPickUp and UIdle to the Behavior Providers array.

4.6. Implementing Consideration Providers
Similarly to the Behavior Providers, we need to implement Consideration Providers
We need to implement DistanceConsideration which will calculate distances to pickable items.
After that’s done, we’re going to write a class for DistanceConsiderationProvider and override UConsiderationProvider’s method `ProduceConsideration to return freshly implemented consideration.
The final DistanceConsideration and UConsiderationProvider code should look like this:
DistanceConsideration should look like this:
class DistanceConsideration : public grail::evaluator::UtilityConsideration
{
public:
  virtual float Evaluate(const grail::EntityBlackboardPair& Context) const override
  {
    return FVector::Dist2D(Context.first->GetBlackboard().GetValue<AAIController*>(EntityBlackboardKeys::AI_CONTROLLER)->GetCharacter()->GetActorLocation(),
      Context.second.GetValue<FVector>("location"));
  }

  virtual std::string GetDisplayName() const override
  {
    return "distance";
  }
};
UCLASS()
class MYGAME_API UDistance : public UConsiderationProvider
{
GENERATED_BODY()
public:
virtual FString GetConsiderationName() const override
{
return "distance";
}
virtual std::shared_ptr<grail::evaluator::UtilityConsideration> ProduceConsideration() const override
{
return std::make_shared<DistanceConsideration>();
}
};Lets do the same for the constant consideration.
class ConstConsideration : public grail::evaluator::UtilityConsideration
{
public:
  virtual float Evaluate(const grail::EntityBlackboardPair& Context) const override
  {
    return 1.0f;
  }

  virtual std::string GetDisplayName() const override
  {
    //this name is used as a display name in debug data
    return "constant";
  }
};
class GRAILPLUGINMVP_API UConstant : public UConsiderationProvider
{
GENERATED_BODY()
public:
virtual FString GetConsiderationName() const override
{
return "constant";
}
virtual std::shared_ptr<grail::evaluator::UtilityConsideration> ProduceConsideration() const override
{
return std::make_shared<ConstConsideration>();
}
};
Be sure that the name returned by GetConsiderationName matches EXACTLY the corresponding consideration is called in the selected configuration file. Otherwise the plugin will be unable to properly provide this consideration to entities.
|
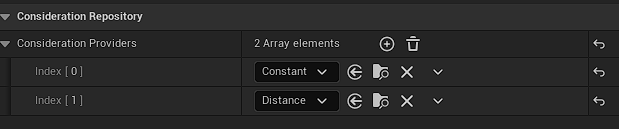
4.7. Adding Considerations to the Consideration Repository
Now we can add our consideration to the Consideration Repository that we created before.
Simply open the Consideration Repository’s blueprint editor and add both UConstant and UDistance to the Behavior Providers array.
4.8. Using Other Reasoners
If you want to use another reasoner or make a custom one, you don’t need to implement behavior or consideration providers, as they are specific to Utility AI.
What we need is to provide our own UReasonerFactory.
An implementation can be found in the code snippet below:
UCLASS()
class UCustomReasonerFactory : public UReasonerFactory
{
  GENERATED_BODY()

  class FactoryInternal : public grail::helpers::IReasonerFactory
  {
    TMap<std::string, TFunction<std::unique_ptr<grail::Reasoner>()>> ReasonerCreationFunctions;

    public:
    //...
    grail::Reasoner CreateReasoner(const std::string& ReasonerID) override
    {
      return ReasonerCreationFunctions[ReasonerID];
    }
    //...
  }

public:
  virtual std::shared_ptr<grail::helpers::IReasonerFactory> CreateFactory()
  {
    return std::make_shared<FactoryInternal>();
  };
}
Then you can add the newly created factory to Grail Configuration Loader’s Reasoner Factories array.
4.9. Adding an AI Manager Actor to the Level
To properly update reasoners and entities' behaviors, AGrailAIManager actor needs to be placed on the level.
Simply drag it onto the level viewport and it should be good to go.
You can customize the number of worker threads used by the manager and the reasoner timestep in Grail AI Manager’s details panel.

4.10. Preparing the AI Controller
Now that we have the configuration in place, we can create the AI Controller that will be used by Grail to move our character.
Just create a new blueprint class inheriting from Unreal’s built-in AAIController and name it BP_GrailAIController
4.10.1. AI Entity Component
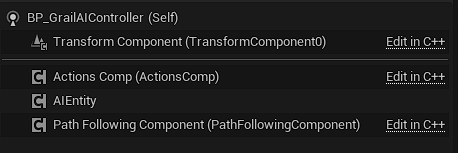
AIEntity is a basic Grail agent able to reason and execute selected behaviors.
We’ve prepared an AIEntityComponent which simply needs to be attached to the AI Controller.
This soldier is supposed to be an autonomous unit, so we need to attach AIEntityComponent to its Character Controller.
Once that’s done, we can configure this component to suit our needs. First, select the GrailConfigurationLoader we’ve created from the Configuration Loader blueprint and then select the picker entity from the dropdown in the Entity Selection section. After that, you should be able to see the imported entity’s name in the corresponding field.
If you need your physical object to be controlled by more than one entity (for example in a twin stick shooter - one entity responsible for movement and one for attacking) you can follow the above process but using EntityGroupComponent instead of AIEntityComponent and everything should be just fine.
|
4.10.2. Blackboard Data Providers
As you could see in the code examples above, we assume that there are pieces of data that are present on the entity’y blackboard.
The data should be provided by a custom Behavior Provider, inheriting from Grail’s UEntityBlackboardDataProvider.
UCLASS(ClassGroup = (Custom), meta = (BlueprintSpawnableComponent))
class GRAILPLUGINMVP_API UPickerBlackboardDataProvider : public UEntityBlackboardDataProvider
{
  GENERATED_BODY()

public:
  UPickerBlackboardDataProvider::UPickerBlackboardDataProvider()
  {
    PrimaryComponentTick.bCanEverTick = true;
    PrimaryComponentTick.bStartWithTickEnabled = true;
  }

  virtual void UPickerBlackboardDataProvider::ProvideBlackboardData(grail::Blackboard& InBlackboard) override
  {
    InBlackboard.SetValue(EntityBlackboardKeys::AI_CONTROLLER, Cast<AAIController>(GetOwner()));
    InBlackboard.SetValue<const TArray<APickable*>*>("pickables", &ObservedPickables);
  }

protected:
  virtual void UPickerBlackboardDataProvider::TickComponent(float DeltaTime, ELevelTick TickType, FActorComponentTickFunction* ThisTickFunction) override
  {
    Super::TickComponent(DeltaTime, TickType, ThisTickFunction);
    ObservedPickables.Reset();

    for (TActorIterator<APickable> PickableItr(GetWorld()); PickableItr; ++PickableItr)
    {
      ObservedPickables.Add(*PickableItr);
    }
  }

private:
  UPROPERTY()
  TArray<APickable*> ObservedPickables{};
};
Now you can add this component to the AIController.
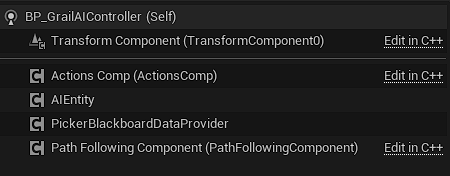
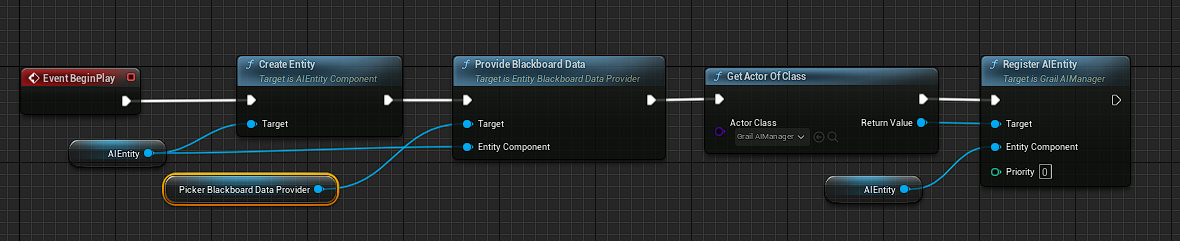
4.10.3. Creating and Registering Entities in Runtime
Having implemented all the necessary component, we need to add a small piece of blueprint code to make our entity register to Grail’s AI Manager.
We need to perform the following operations:
-
Create the AI Entity, by calling
Create Entityon AI Entity Component -
Provide blackboard data, by calling
Provide Blackboard Dataon Picker Blackboard Data Provider -
Get a reference to an
AAIManageractor and register the entity. For simplicity, in this tutorial it is done by searching forAGrailAIManagerusing theGet Actor Of Classnode, but you might want to store the manager actor in your game instance object.